



Kast Kreation's Blogspot Ver. 2.0 is now live!
Took a little time out of our busy schedule to give the blog a nice new look.

Riddler Spotted!
Kast Kreation's work spotted at local con! Check out the Riddler cane build.

New Items In The Shop
Stop into the shop and check out the cool Ghostbusters stuff we have in there.
Showing posts with label Conversion. Show all posts
Showing posts with label Conversion. Show all posts
Monday, September 17, 2012
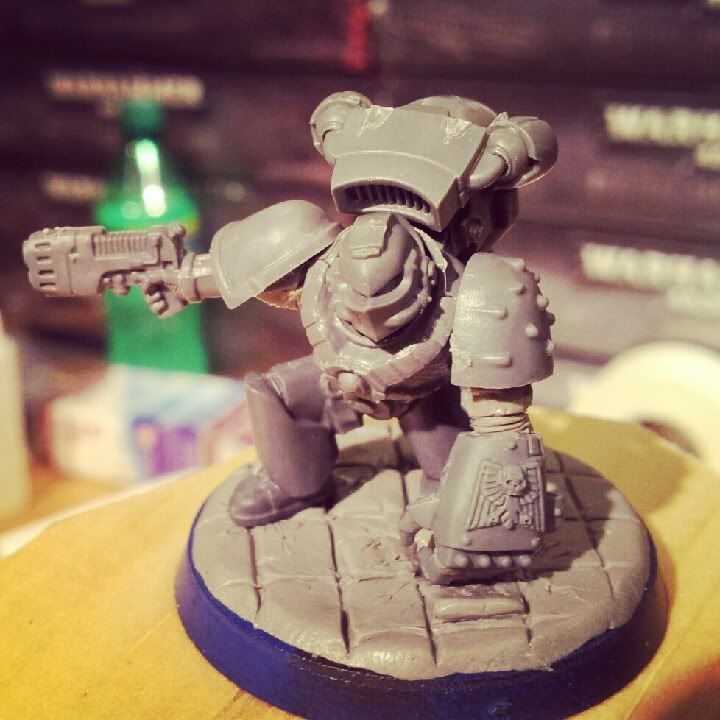
Iron Man Space Marine
So I was sitting around before work and decided to work on my Carcharodons for Warhammer 40k. I have been working on and off with them for some time and just need to take the time to finish them up. Also I figured if I started posting them it would give me the motivation to do just that. We will see. The first I wana share is my Space Marine Assault Sergent in a classic Iron Man pose. Let me know what you guys think.


Tuesday, July 31, 2012
A Step Into A New Miniature Game

Now one of the things I like most about the game is the lack of dice that is needed. The system uses a "fate deck" which is pretty much playing card you can pick up from anywhere. I could go into game play and talk about it all day, but just hit up the games main page @www.malifaux.com/
Tuesday, June 14, 2011
As Promised!
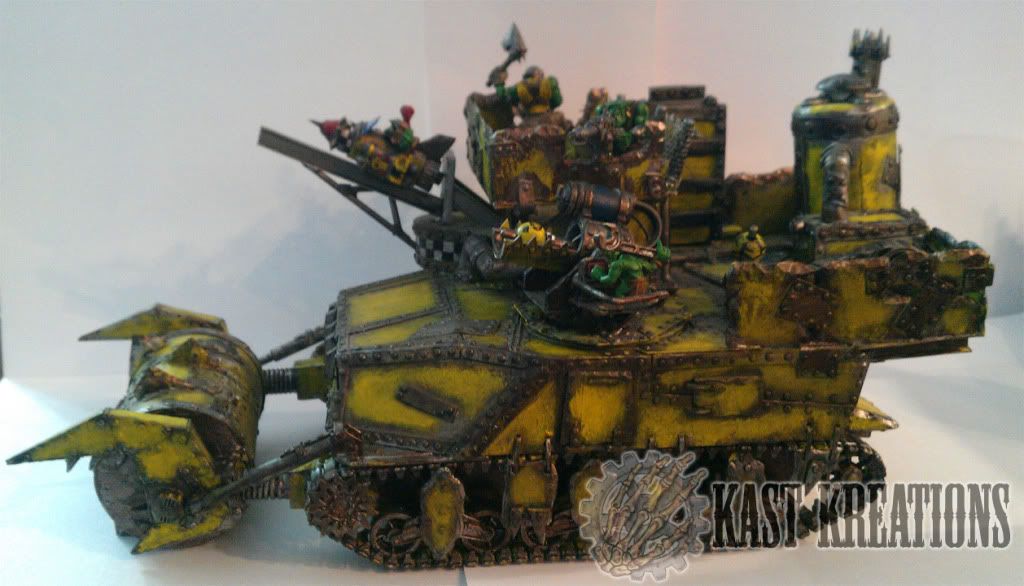
 As I said in my last post I was going to be finishing up the battlewagon I started a little over a year ago. Well, it has taken way too long but it is done!
  or maybe during the weekend, haven't decided yet.
-Shawn out.
Monday, June 13, 2011
More Paint On The Battlewagon.
So I have  had this battlewagon sitting in my closet unfinished for WAY too long. I decided to break it out and finally put the finishing touches. Chances are it'll be done either later tonight or early tomorrow. Take a look at what I have done so far. First image is of the grot rocket that slides on and off the track shown in earlier pictures of the painted wagon itself. Next up we have a shot of the turret that is placed where the big
  hole in the main platform is. As soon as the wagon is complete I will take some more pictures of everything where it belongs.
PS. I am also starting work on a few none ork related minis that I have had sitting about for a while that I have gotten to work on the past few days. Looking forward to seeing what people think.
-Shawn Out
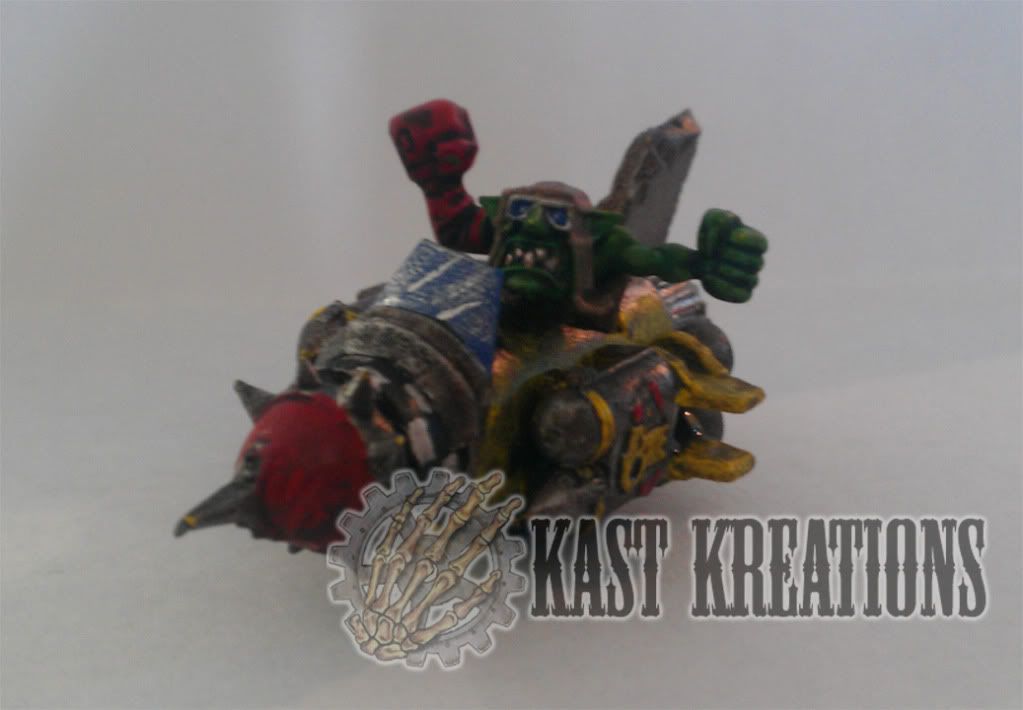 had this battlewagon sitting in my closet unfinished for WAY too long. I decided to break it out and finally put the finishing touches. Chances are it'll be done either later tonight or early tomorrow. Take a look at what I have done so far. First image is of the grot rocket that slides on and off the track shown in earlier pictures of the painted wagon itself. Next up we have a shot of the turret that is placed where the big
  hole in the main platform is. As soon as the wagon is complete I will take some more pictures of everything where it belongs.
PS. I am also starting work on a few none ork related minis that I have had sitting about for a while that I have gotten to work on the past few days. Looking forward to seeing what people think.
-Shawn Out
Sunday, October 10, 2010
Old Zoggy
So I have been flipping through the Ork Codex the past few weeks trying to figure out a new project to start... Yes I know, I have unfinished projects I should get done before going on to yet another. But honestly, it's gotten to the point where  looking at vehicles is making my head hurt (more like my hands, popping rivets for 2 hours only to cover half a vehicle is sad). So I figured I would do a special character, no wheels, no wires, or rivets just good ol' fashion flesh and bone. I thought the fluff picture of Old Zogwart was cool, so I figured why the hell not. Went through all my bits, picked out a few things and ended up using the body of one of the bike boys, a head of a boy which I'm not entirely sure what it came from and just a normal pair of legs. I also used the arm of the boy throwing a stick grenade to use for his staff arm.
 looking at vehicles is making my head hurt (more like my hands, popping rivets for 2 hours only to cover half a vehicle is sad). So I figured I would do a special character, no wheels, no wires, or rivets just good ol' fashion flesh and bone. I thought the fluff picture of Old Zogwart was cool, so I figured why the hell not. Went through all my bits, picked out a few things and ended up using the body of one of the bike boys, a head of a boy which I'm not entirely sure what it came from and just a normal pair of legs. I also used the arm of the boy throwing a stick grenade to use for his staff arm.

Saturday, May 8, 2010
Painting is fun!
So this is gonna be a short blog post, after starting paint on my Battle Wagon, I went and painting up the one part of t he stompa that was ready for it, which was the moon stomach plate that was made using the faceplate provided with the GW kit. Once again I used JoAnn Essentials, which as I stated earlier I got at JoAnn fabrics for about 98 cents a can. Good deal considering Army Painter is like 15 dollars a can. I think it turned out pretty good, comment and let me know!
Signing out,
Shawn
 he stompa that was ready for it, which was the moon stomach plate that was made using the faceplate provided with the GW kit. Once again I used JoAnn Essentials, which as I stated earlier I got at JoAnn fabrics for about 98 cents a can. Good deal considering Army Painter is like 15 dollars a can. I think it turned out pretty good, comment and let me know!
Signing out,
Shawn
Friday, May 7, 2010
Scratch Built Battle Wagon
 So took some time away from the Stompa to sit down and go through some old pictures of conversions that haven't been touched in a WHILE, it's been about a year now since I had worked on anything other then the stomp. A lot has come up but I got around to working on my scratch built battle wagon. It has FINALLY gone into the paint stage! But instead of skipping right to showing off the paint job since I have the pictures of the build I figured I'd show that off first
Friday, April 30, 2010
From the inside out!
After long debating with myself on if I should or shouldn't do an inside of the cockpit,  be cheap and just leave it completely blank on the inside. I decided to go with setting stuff up inside so the top could be removed to show off all the orkies working to kill something. First I used some resin doors my buddy over at Bossmans's Bitz Box gave me to seal off the cockpit from the rest of the head. then using some wire and plastic card tubes did some other details here and there to give it more of a cockpit feel, since the inside of the battle wagon wasn't intended on being seen for the most part.
 be cheap and just leave it completely blank on the inside. I decided to go with setting stuff up inside so the top could be removed to show off all the orkies working to kill something. First I used some resin doors my buddy over at Bossmans's Bitz Box gave me to seal off the cockpit from the rest of the head. then using some wire and plastic card tubes did some other details here and there to give it more of a cockpit feel, since the inside of the battle wagon wasn't intended on being seen for the most part.
Thursday, April 29, 2010
Stompa continues!
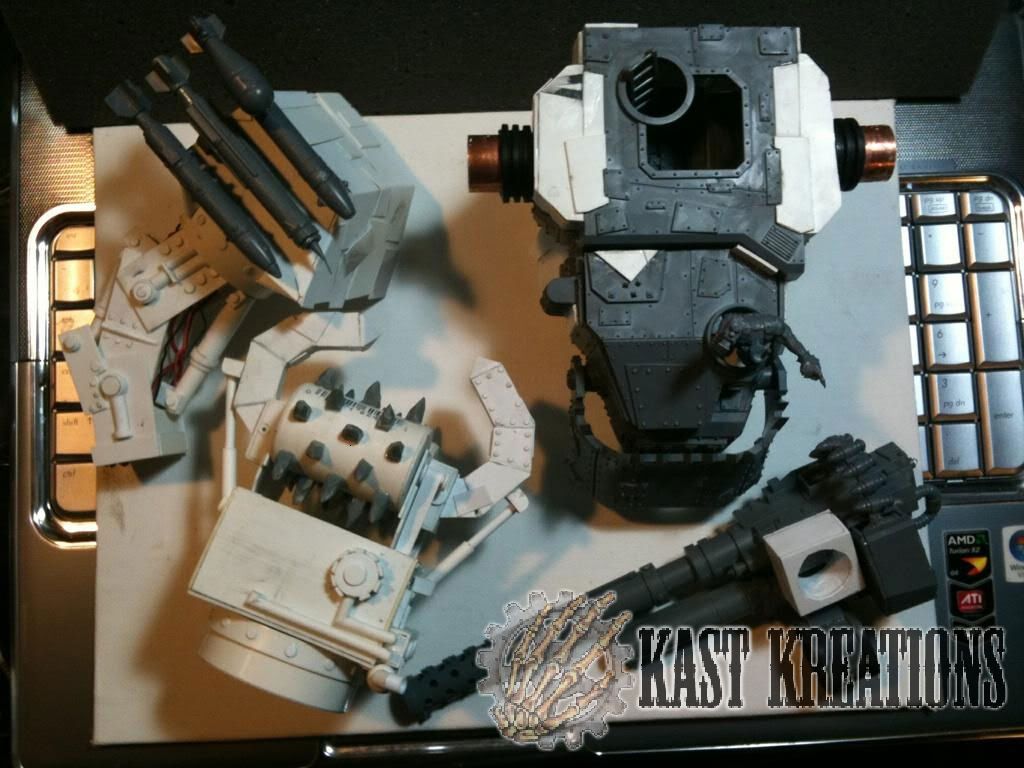 Thankfully when I was working on the project, I pre-thought out the idea of making it easy to transport. I made the head, and arms completely removable. After showing it off to a few people I was given the idea to use that for more then just transport. I have already started working on different arms and claws that could be swapped out to give the Stompa different equipment such as more shootas or even a large deff rolla to squish anything that gets in the way of my over-sized monster. The other arm at this time is just a mildly modified version of the guns that came with the GW Stompa kit I still have to build a whole left arm that is much more detailed and not as "weedy".
Putting the stomp, in Stompa!
I'v decided the first of my creations I will be showcasing is my Converted GW Stompa.  After seeing a few of them built, I had come to the conclusion that it just wasn't good enough the way it was. Sadly I didn't take picture's of the start of my Stompa, but I'll fill you in. First I assembled the body as the instructions said. This wasn't the part of the Stompa I had issues with. I then proceeded to fill the gaps where the arms would of gone with plastic card. Blending the shapes to make it appear correct when it came time for paint. I also reworked the neck using PVC pipe so I could attach the GW Batttlewagon as the head. This mod was seen in March 2009's issue of White Dwarf.
 After seeing a few of them built, I had come to the conclusion that it just wasn't good enough the way it was. Sadly I didn't take picture's of the start of my Stompa, but I'll fill you in. First I assembled the body as the instructions said. This wasn't the part of the Stompa I had issues with. I then proceeded to fill the gaps where the arms would of gone with plastic card. Blending the shapes to make it appear correct when it came time for paint. I also reworked the neck using PVC pipe so I could attach the GW Batttlewagon as the head. This mod was seen in March 2009's issue of White Dwarf.
Subscribe to:
Posts (Atom)


