 avannah monitors, a leopard gecko, a beautiful female bearded dragon and a senegal chameleon. Thankfully I already had plenty of gear at home to set up decent homes for everything but the chameleon. After joining a chameleon forum, looking at setups done by some of the most creative people, I started work on my own reptile home. I started with an old broken spy sunglass case i got from work. I stripped it down, removing all the plexiglass to make room for the plans and screen mesh.
 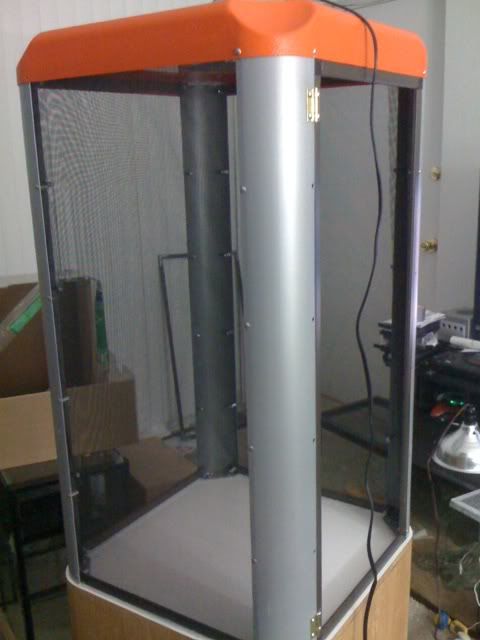 Using screen window framing from Home Depot and the screws provided with the sunglass case I created a fully enclosed living space. Building a door with the same window framing that kept the walls secure brought the whole thing together. I then proceeded to start the first application of silicon to ensure a water tight seal so not to warp the wood. I built a thin bamboo frame around the inside of the enclosure, other people had used this method to keep their chameleon off of the screen mesh, and it seems to work really well. I then worked on the french drain style system to remove any water that would build up at the bottom of the enclosure
  due to regular watering. A plexiglass shield toward the bottom of the enclosure would help water from splashing out and heading down toward the drain. That was done using sheets of polystyrene cut in a downward slope sealed with silicon, had a waterproof tarp glued down then sealed again with more silicon. A small hole was drilled into the bottom and a tub was sealed into place giving the water a place to go, into one of two drainage tubs located under the main enclosure. Now all this talk about water and no real talk about how exactly this water will be applied inside the enclosure. At first I figured I'd just spray him down 2, 3 times a day, but I then found out senegals, like most chameleons need much more water then that. So after seeing a post on the forums about a DIY rain system, I built one of my own. Using a 25 dollar pond pump from
  The Depot, some large tubing and then some small, hard black tubing I had laying around the house for some reason or another. I decided how much I was going to use and poked holes in the black tubing with a sewing needle to give the water somewhere to escape from. One test is all it took for me to decide this was the system I wanted to use, I went ahead and rigged it up with a timer I also had laying around the house for the perfect rain system. I run it about 12 times a day for about 2 mins each time. Giving them plenty of water and keeps the humility exactly where it needs to be. Lighting is another important part of the chameleons world. Two types of lighting is required to keep a chameleon healthy, UVA and UVB, UVA is the normal rays almost all light gives off, this is normally handled with any heat bulb or even spotlight. You can see from the rain system picture where the heat bulb sits making it easy for it to bask. UVB on the other hand is special, requi
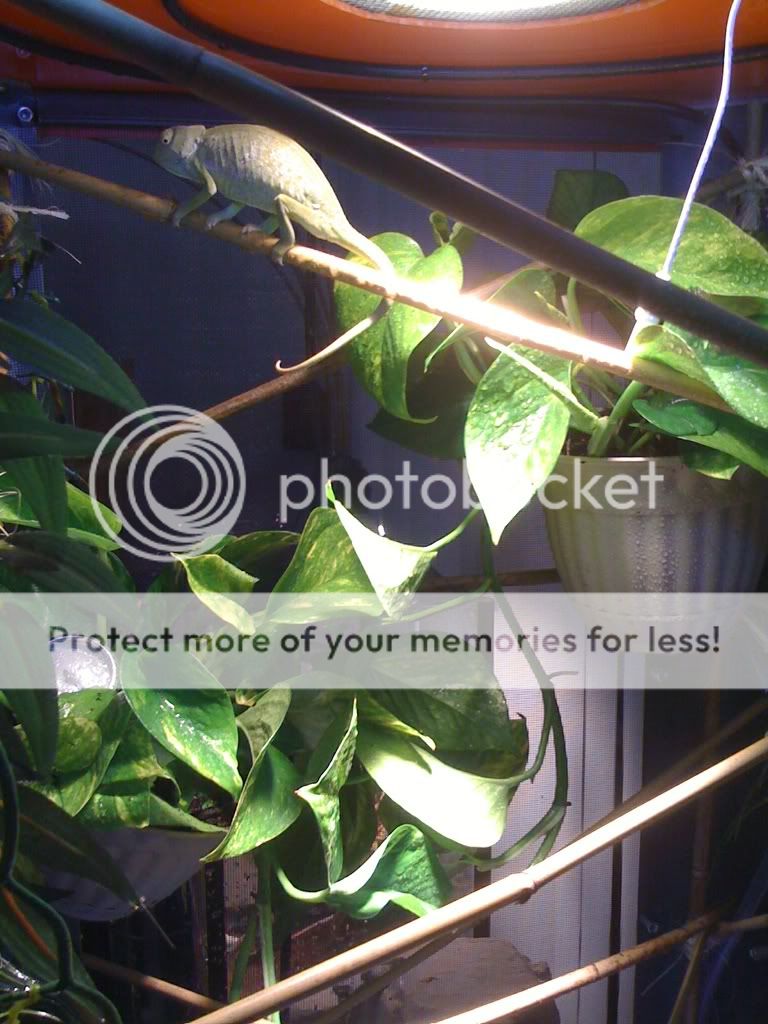 res one of two things, direct sunlight from outside, or a special bulb, I spoil my chameleon with both, it's enclosure is right near a sealed (no draft) window but I also have a UVB bulb hard at work inside it's home to make sure even on those rainy days it gets it's UVB. Lastly I added some live plants in order to keep it as natural as I could. The plants I used are Golden Pothos plans, they are perfect for chameleons, they love water, and have huge waxy leaves that chameleons will have an easy time drinking off of. In this last picture I only have two small pothos pots but I have added two more and my chameleon loves how much it can move around its new home. Hope I didn't babble too much in this post, it's pretty late... Well enough for now!
Shawn OUT.
P.S. If you look in the background of the drain picture you can see a sneak peak of the next Kast Reptiles project.


No comments:
Post a Comment